
Introduction
There’s something magical about the combination of rich chocolate and creamy peanut butter that makes dessert lovers everywhere smile. These Chocolate Peanut Butter Bars deliver that perfect sweet-and-salty balance in every bite, creating an irresistible treat that’s surprisingly simple to prepare. Whether you’re planning a family gathering, need a quick dessert for unexpected guests, or simply craving something indulgent, these No-Bake Chocolate Peanut Butter Bars require minimal effort and no oven time. The best part? You probably already have most ingredients in your pantry. With just a handful of staple items and about 15 minutes of active preparation, you’ll create a dessert that rivals any bakery confection. The buttery peanut butter base pairs beautifully with the smooth chocolate topping, creating layers of flavor and texture that satisfy even the most discerning sweet tooth. These bars are perfect for meal prep, potlucks, bake sales, or whenever you need a crowd-pleasing dessert without the stress of complicated baking techniques.
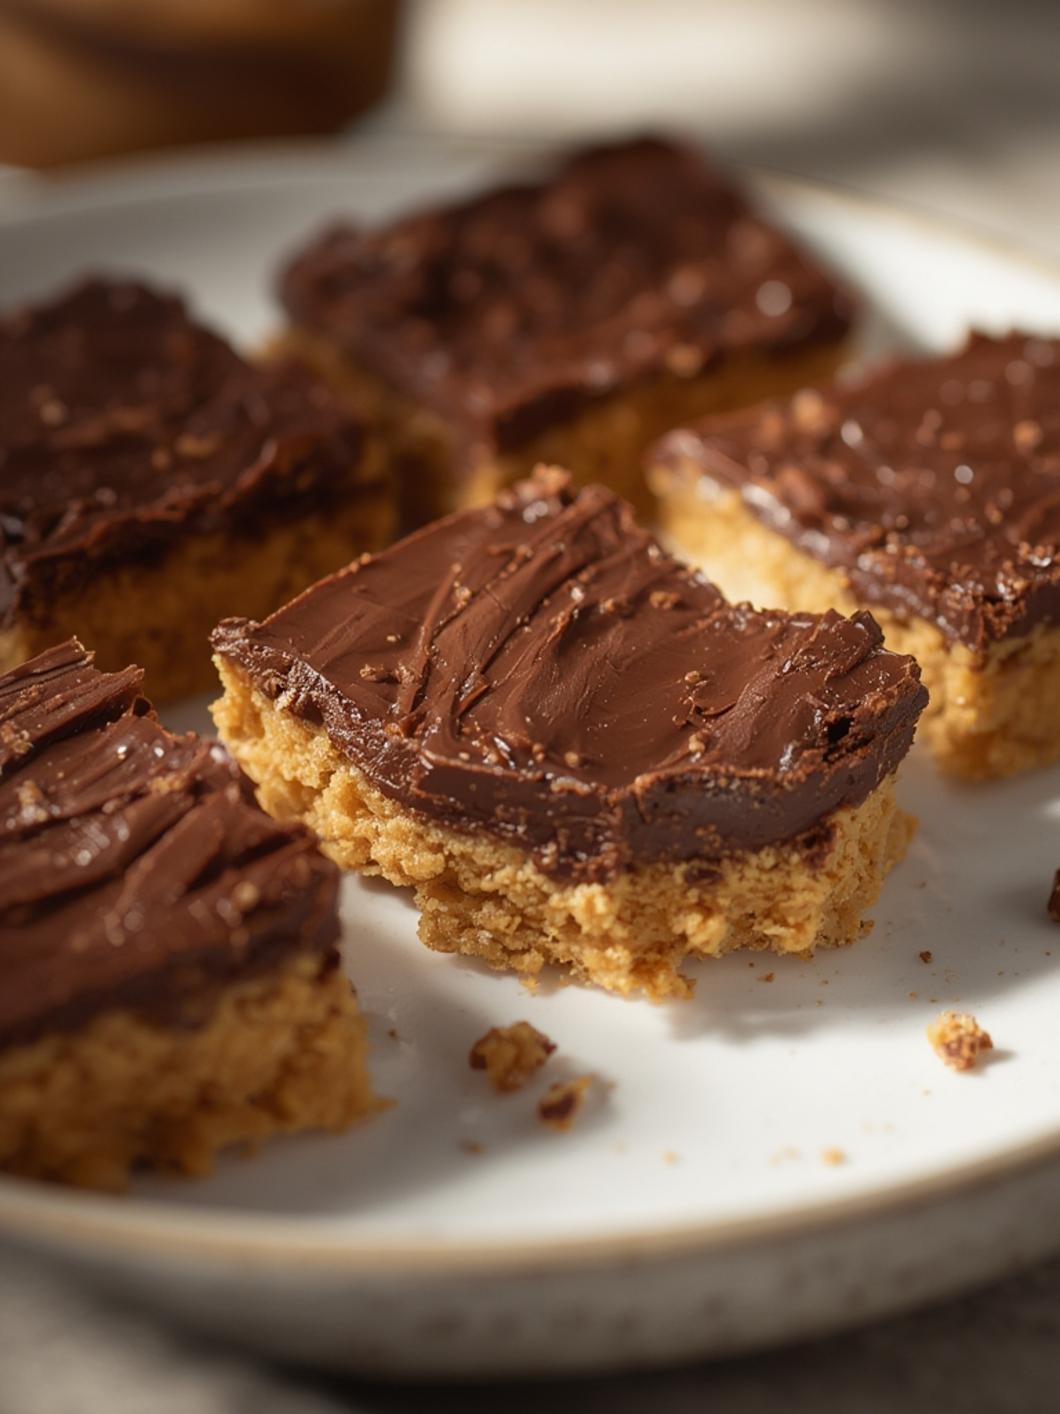
Step-by-Step Instructions
Ingredients:
For the peanut butter layer:
– 1 cup creamy peanut butter
– ½ cup unsalted butter, melted
– 2 cups powdered sugar
– 1½ cups graham cracker crumbs
– 1 teaspoon vanilla extract
– ¼ teaspoon salt
For the chocolate topping:
– 1½ cups semi-sweet chocolate chips
– 3 tablespoons creamy peanut butter
– 1 tablespoon coconut oil (optional, for shine)
Instructions:
Start by preparing your workspace. Line a 9×13-inch baking pan with parchment paper, leaving extra overhang on the sides for easy removal later. This simple step makes cleanup effortless and ensures perfect bar removal.
In a large mixing bowl, combine the melted butter and one cup of peanut butter, stirring until completely smooth and well incorporated. The mixture should be glossy and uniform in color.
Add the powdered sugar gradually, mixing after each addition to prevent clumping. Fold in the graham cracker crumbs, vanilla extract, and salt. Mix thoroughly until the mixture resembles wet sand and holds together when pressed. This creates the foundation layer for your Chocolate Peanut Butter Bars.
Transfer the peanut butter mixture to your prepared pan. Using clean hands or a spatula, press the mixture firmly and evenly across the bottom of the pan. Apply consistent pressure to eliminate air pockets and create a compact, uniform layer. Place the pan in the refrigerator while preparing the chocolate topping.
For the chocolate layer, combine chocolate chips, three tablespoons of peanut butter, and coconut oil in a microwave-safe bowl. Microwave in 30-second intervals, stirring between each interval, until completely melted and smooth. Alternatively, use a double boiler for more controlled melting.
Remove the pan from the refrigerator and pour the chocolate mixture over the peanut butter layer. Use an offset spatula to spread the chocolate evenly across the entire surface, reaching all corners and edges. The warm chocolate will settle into any small imperfections, creating a beautiful glossy finish on these No-Bake Chocolate Peanut Butter Bars.
Refrigerate for at least two hours, or until the chocolate has completely set and the bars are firm enough to slice cleanly.
Tips
Temperature control significantly impacts your results. Ensure the melted butter isn’t too hot when mixing with peanut butter, as excessive heat can make the base layer greasy and difficult to work with.
For cleaner cuts, remove the bars from the refrigerator and let them sit at room temperature for five minutes before slicing. Use a sharp knife wiped clean between cuts to achieve professional-looking edges.
Natural peanut butter isn’t ideal for this recipe since it separates and contains more oil, which can prevent proper setting. Stick with conventional creamy peanut butter for best results.
Customize your bars by sprinkling sea salt flakes, chopped peanuts, or mini chocolate chips on top of the melted chocolate layer before refrigeration. These additions create visual appeal and extra texture.
Store finished bars in an airtight container in the refrigerator for up to two weeks, or freeze for up to three months. Separate layers with parchment paper to prevent sticking.
Alternative Methods
Transform these bars into bite-sized treats by using a mini muffin tin instead of a rectangular pan. Press the peanut butter mixture into each cup, add chocolate on top, and refrigerate until set.
Create a healthier version by substituting half the powdered sugar with protein powder and using dark chocolate with 70% cacao or higher. This modification reduces overall sugar content while maintaining delicious flavor.
For a gluten-free option, replace graham cracker crumbs with crushed gluten-free cookies, almond flour, or finely ground gluten-free oats. The texture remains similar with these substitutions.
Make them extra decadent by adding a middle layer of caramel or chocolate ganache between the peanut butter base and chocolate topping, creating triple-layer bars with enhanced richness.
Conclusion
These Chocolate Peanut Butter Bars prove that impressive desserts don’t require professional skills or hours in the kitchen. The straightforward preparation process, combined with pantry-friendly ingredients, makes this recipe accessible for bakers of all experience levels. The no-bake method means you can enjoy these treats year-round without heating up your kitchen during warm weather. The satisfying combination of textures—from the dense, cookie-like peanut butter base to the smooth chocolate topping—creates a dessert experience that feels indulgent yet homemade. These No-Bake Chocolate Peanut Butter Bars have become a staple recipe for countless home bakers because they consistently deliver fantastic results with minimal fuss. Once you master this basic recipe, you’ll find endless opportunities to customize and adapt it to your preferences. Whether served at celebrations, packed in lunchboxes, or enjoyed as an after-dinner treat, these bars never disappoint. Make a batch today and discover why this simple recipe has earned its place as a beloved classic dessert.